Showing posts with label php. Show all posts

Download Simple Inventory System Using PHP/MySQL

I developed this code to those beginner programmer who found difficulties in creating their inventory system using php/mysql. The feature of this system are, it generates daily inventory report, secure login because i use md5 encryption for login and registration . 

It also generate reports such as daily, weekly, monthly, and yearly. This system has many features not just the features written above. To try this system just download and run this system. If you have question, suggestion or anything, just leave comment and it's my pleasure to entertain your comments.

database name: liveedit

username: admin
password: admin

https://app.box.com/s/6m70bxmwoqi56yxx8syaga4cvdba83ji

Download Student Monitoring System Using RFID PHP Script

PHP requirement: at least 5.0

The system use RFID to count the total number of the student who logged. Similar to logged book but it's automated.

Features:

1. can add,edit,delete,view student
2. count student log by course
3. can log in using RFID(usb)Scanner
4. RFID frequency is 125khz
5. can log in, in web based or in windows form


note: i will just add the link of the uploaded windows form system for the arduino RFID, but the system still work without it and the student can still login using RFID.

user: admin
pass:admin

How to Secure PHP Web Applications and Prevent Attacks?


As a developer you must know how to build a secure and bulletproof application. Your duty is to prevent security attacks and secure your application.

Checklist of PHP and Web Security Issues

Make sure you have these items sorted out when deploying your application into production environment:
  1. Cross Site Scripting (XSS)
  2. Injections
  3. Cross Site Request Forgery (XSRF/CSRF)
  4. Public Files
  5. Passwords
  6. Uploading Files
  7. Session Hijacking
  8. Remote File Inclusion
  9. PHP Configuration
  10. Use HTTPS
  11. Things Not Listed

Cross Site Scripting (XSS)

XSS attack happens where client side code (usually JavaScript) gets injected into the output of your PHP script.
// GET data is sent through URL: http://example.com/search.php?search=<script>alert('test')</script>
$search = $_GET['search'] ?? null;
echo 'Search results for '.$search;

// This can be solved with htmlspecialchars
$search = htmlspecialchars($search, ENT_QUOTES, 'UTF-8');
echo 'Search results for '.$search;
  • ENT_QUOTES is used to escape single and double quotes beside HTML entities
  • UTF-8 is used for pre PHP 5.4 environments (now it is default). In some browsers some characters might get pass the htmlspecialchars().

Injections

SQL Injection

When accessing databases from your application, SQL injection attack can happen by injecting malicious SQL parts into your existing SQL statement.

Directory Traversal (Path Injection)

Directory traversal attack is also known as ../ (dot, dot, slash) attack. It happens where user supplies input file names and can traverse to parent directory. Data can be set as index.php?page=../secret or /var/www/secret or something more catastrophic:
$page = $_GET['page'] ?? 'home';

require $page;
// or something like this
echo file_get_contents('../pages/'.$page.'.php');
In such cases you must check if there are attempts to access parent or some remote folder:
// Checking if the string contains parent directory
if (strstr($_GET['page'], '../') !== false) {
    throw new \Exception("Directory traversal attempt!");
}

// Checking remote file inclusions
if (strstr($_GET['page'], 'file://') !== false) {
    throw new \Exception("Remote file inclusion attempt!");
}

// Using whitelists of pages that are allowed to be included in the first place
$allowed = ['home', 'blog', 'gallery', 'catalog'];
$page = (in_array($page, $allowed)) ? $page : 'home';
echo file_get_contents('../pages/'.$page.'.php');

Command Injection

Be careful when dealing with commands executing functions and data you don’t trust.
exec('rm -rf '.$GET['path']);

Code Injection

Code injection happens when malicious code can be injected in eval() function, so sanitize your data when using it:
eval('include '.$_GET['path']);

Cross Site Request Forgery (XSRF/CSRF)

Cross site request forgery or one click attack or session riding is an exploit where user executes unwanted actions on web applications.

Public Files

Make sure to move all your application files, configuration files and similar parts of your web application in a folder that is not publicly accessible when you visit URL of web application. Some file types (for example, .yml files) might not be processed by your web server and user can view them online.
Example of good folder structure:
app/
  config/
    parameters.yml
  src/
public/
  index.php
  style.css
  javascript.js
  logo.png
Configure web server to serve files from public folder instead of your application root folder. Public folder contains the front controller (index.php). In case web server gets misconfigured and fails to serve PHP files properly only source code of index.php will be visible to public.

Passwords

When working with user’s passwords hash them properly with password_hash() function.

Uploading Files

A lot of security breaches happen where users can upload a file on server. Make sure you go through all the vulnerabilities of uploading files such as renaming uploaded file, moving it to publicly unaccessible folder, checking file type and similar. Since there are a lot of issues to check here, more information is located in the separate FAQ:

Session Hijacking

Session hijacking is an attack where attacker steals session ID of a user. Session ID is sent to server where $_SESSION array gets populated based on it. Session hijacking is possible through an XSS attack or if someone gains access to folder on server where session data is stored.

Remote File Inclusion

Remote file inclusion attack (RFI) means that attacker can include custom scripts:
$page = $_GET['page'] ?? 'home'

require $page . '.php';
In above code $_GET can be set to a remote file http://yourdomain.tld/index.php?page=http://example.com/evilscript
Make sure you disable this in your php.ini unless you know what you’re doing:
; Disable including remote files
allow_url_fopen = off
; Disable opening remote files for include(), require() and include_once() functions.
; If above allow_url_fopen is disabled, allow_url_include is also disabled.
allow_url_include = off

PHP Configuration

Always keep installed PHP version updated. You can use versionscan to check for possible vulnerabilities of your PHP version. Update open source libraries and applications and maintain web server.
Here are some of the important settings from php.ini that you should check out. You can also use iniscan to scan your php.ini files for best security practices.

Error Reporting

In your production environment you must always turn off displaying errors to screen. If errors occur in your application and they are visible to the outside world, attacker can get valuable data for attacking your application. display_errors and log_errors directives in php.ini file:
; Disable displaying errors to screen
display_errors = off
; Enable writing errors to server logs
log_errors = on

Exposing PHP Version

PHP version is visible in HTML headers. You might want to consider hiding PHP version by turning off expose_php directive and prevent web server to send back header X-Powered-By:
expose_php = off

Remote Files

In most cases it is important to disable access to remote files:
; disabled opening remote files for fopen, fsockopen, file_get_contents and similar functions
allow_url_fopen =  0
; disabled including remote files for require, include ans similar functions
allow_url_include = 0

open_basedir

This settings defines one or more directories (subdirectories included) where PHP has access to read and write files. This includes file handling (fopen, file_get_contents) and also including files (include, require):
open_basedir = "/var/www/test/uploads"

Session Settings

  • session.use_cookies and session.use_only_cookies
    PHP is by default configured to store session data on the server and a tracking cookie on client side (usually called PHPSESSID) with unique ID for the session.
; in most cases you'll want to enable cookies for storing session
session.use_cookies = 1
; disabled changing session id through PHPSESSID parameter (e.g foo.php?PHPSESSID=<session id>)
session.use_only_cookies = 1
session.use_trans_sid = 0
; rejects any session ID from user that doesn't match current one and creates new one
session.use_strict_mode = 0
  • session.cookie_httponly
    If the attacker somehow manages to inject Javascript code for stealing user’s current cookies (the document.cookie string), the HttpOnly cookie you’ve set won’t show up in the list.
session.cookie_httponly = 1
  • session.cookie_domain
    This sets the domain for which cookies apply. For wildcard domains you can use .example.com or set this to the domain it should be applied. By default it is not enabled, so it is highly recommended for you to enable it:
session.cookie_domain = example.com
  • session.cookie_secure
    For HTTPS sites this accepts only cookies sent over HTTPS. If you’re still not using HTTPS, you should consider it.
session.cookie_secure = 1

Use HTTPS

HTTPS is a protocol for secure communication over network. It is highly recommended that you enable it on all sites. Read more about HTTPS in the dedicated FAQ: How to Install SSL Certificate and Enable HTTPS.

What is Next?

Above we’ve introduced many security issues. Security, attacks and vulnerabilities are continuously evolving. Take time and check some good resources to learn more about security and turn this check list into a habit:
Download Content Management System PHP source code

Download Content Management System PHP source code

I create this Content Management System as my Final year Project.
Content management system is a web based application which help individual, company,web designer and administrators to create and manage website easily. This project aim to simplify web development by giving people a tools to simplify creation of beautiful website or blog and management of that website. Some features of the software will be:
  • Creating a website or blog.
  • Change theme of that website.
  • Managing that website.
First on thing tou need to do is to install this system in your Web server Directory if you are using WAMP SERVER just copy system files and paste in www folder.

After that open your web-browser such as Google Chrome or Mozilla Firefox then in URL bar write localhost Or 127.0.0.1

When you open that link the following display will appear
Installation Picha namba moja


You need to follow the instruction in order to install this system succesifull
  1. Go to your Database and create a database.
  2. Go in config file available in controller Folder and edit it by providing your database name, hostname and the password
  3. Fill the form by providing
    • Site Type
    • Site Name
    • Admin Email
    • Admin Username
    • Admin Password
    • Re-enter Admin Password
  4. Note: The following button used to change language just click it to change language

    Language changer

    After filling all the input required then click Create

    Tables will be created in the database you specified then login to your account by using Admin Username and Password

    Login Page

    After that click Login then if the provided username and password is correct to the one in the database then you will be logged in else if the provided username and password is incorrect to the one in the database then you will need to repeate logging in.

    This is the page that you will see when logging in

    Login Page


Pages

Pages is the part our system where we can put a description of a particular issue.

How to create Page

You can create a page by clicking the Page link in the Navigation bar the click on create new page
The follwing interface will appear
Create new Page

After that Fill the inputs by providing your page name , Page contents and the status of the page if it is Published or saved :: The saved page will not be displayed on the menu until they are Published
You can view all Pages you created by click All Pages link above... and the following interface will appear
All pages

You can view ,edit and Delete Pages as you want.


Categories

In our system we use Category to categorize our Posts.You can create a Category by clicking the Category link in the Navigation bar the click on create new Category
The follwing interface will appear
Create new Category

After that Fill the input by providing your Category name .
You can view all Categories you created by click All Categories link above... and the following interface will appear
All Categories

You can view ,edit and Delete Categories as you want.


Menu

To create menu in our system is Simple as creating pages and categories You can create menu by clicking Menu on the navigation menu of your admin panel and click Create new menu Create new Menu

There you can enter menu name and position of your menu.

:: Position of menu depends on the theme.

You can add menu pages and categories by click all menus and edit a menu yo want to add pages and categories
The following page will open then you can click add to add that page or category.

Add pages and categories to menu


Themes

You can add new theme of your website by uploading it.
Click in themes then add new theme there you can upload that theme and the theme must be in Zip format.

How to Create your own theme?

It is simple but you need to know Html, Css and Php
Because we are sing Object Orinted Programming so you need to have a basics knowledge of that.

Only you need to do is to create an html interface with css stylesheet and Calling php methods that can be used to call specific function.

The following are methods we are using:
In Categories Fist include models/categories.php
  1. $profile->posts -------------- View specific category Posts

In Header Fist include models/header.php
  1. $header->head -------------- Show site title
  2. $header->topmenu -------------- Show Top menu
  3. $header->navmenu -------------- Show Navigation Menu
  4. $header->bottommenu -------------- Show Bottom menu

In Pages Fist include models/pages.php
  1. $profile->pageyenyewe -------------- View Page on the menu


Media

To add media in this sytem just go to the navigation menu and click Media there you can see all the photos you add.

To add new photo just click Add new Media and the following page will open
Add new Media

Then browse your photo and click add.


Posts

To add Post in your website click Posts in the navigation menu then click Create new Post
Create new Post

There you can add post title,post contents and choose category where your post will be displayed.

You can edit your Posts contents by using small buttons above. Also you can add photo by clicking on the photo button and provide photo URL adding from the Media Gallery.


Users

In Users page you can add, edit and delete users of the system and also you can provide authority for users this authority will be either Admin or Author

To add new user click in Users then Add new User
Add new User

And to view all users just click in All user link above.
All Users 
 

Download Code Here: http://www.mediafire.com/download/xblar4f60xjzlha/our_project.zip 

Download Sales Management System PHP Source code

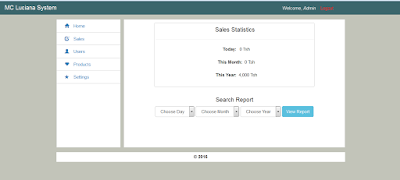
I develop this Sales Management system to use in my sister shop for managing sales and product on the shop,
This system have two users which are:
  1. Admin
  2. Saler

 Saler Functions

The following are functions of saler on the system:
  1. Add Sales
  2. Edit Sales
  3. View Products
  4. Change your Account Password
Sales Management System

  • Admin Functions 

    The following are functions of admini on the system:

    1. View Sales Statistics
    2. Generate Daily, Monthly and year report.
    3. Add, edit and delete system Users
    4.  Add Product, Product Price,and Quantity

    To login Enter the following details:

    Admin Panel:
    Username: Admin
    Password: admin 

    Saler Panel:
    Username: Saler
    Password: saler


    Sales Management System


    I really love comment

Download Music Sharing System PHP Source code


Hello welcome again to my blog, today i`m happy to share my first project that I develop by using codeigniter (MVC based php framework) as a backend framework and Bootstrap as the frontend framework.

This project is Online Music sharing website which allow the owner of the site to share songs/music and any audio.


This system has the following features for client
  1.  View songs
  2.  View artists
  3.  View genres
  4.  Search artist
  5.  View artist bio and songs
  6.  Download unlimited songs
  7.  Share song to other website
  8.   View popular downloaded songs 


This system has the following features for Administrator
  1. Add and delete songs
  2.  Add , edit and delete Artists
  3.  Add artist bio
  4.  Add and Update Genre
  5. View statistics
  6.  Change website name 
  7.  Add advertisement on the web (Adsense)
  8.  Add and delete users
  9.  View Top Ten Downloaded Songs

To login to admin panel use the following:
 
Link:               /admin


Username: Florian


Password:   thefleva


For any problem just write the comment I will be happy to answer you.

Download Hospital Management System PHP Source code


The assignment is to design and develop hospital management system. Below is the description of how the system works:

  1.  Patient attends the hospital and meets the Receptionist at the front counter.
  2.  The Receptionist asks about the patient’s details e.g. Name, what doctor they want to see etc. and assigns the patient to the relevant doctor as he/she sends the patient’s information to that doctor.
  3.  When the patient visits the doctor, the doctor asks about what he/she is suffering from. The doctor may assign the patient to the lab to undergo various tests / scans or he may prescribe medicine and assign the patient to the pharmacist.
  4.  The laboratory department will receive the patient’s information from the doctor and perform certain scans / tests as indicated by the doctor and will send the results back to the doctor.
  5.  The doctor will prescribe the medicine and send the prescription to the pharmacist.
  6.  The Pharmacist shall give the patient medicine and then will calculate the total cost of the medicine and send the report to the bursar.
  7.   The Bursar shall demand payment for the purchased medicine.

§ 


Note: The users can update/change their information e.g username / password once they log into the system.
https://app.box.com/s/p6x4gw2e659ul1fxx0kcgtwtd0pyzqej


USER INTERFACE


The requirement of this assignment is to create a user interface which cooperates with the database to access the Hospital Management System.

For user interface, we have used MySQL, PHP, and HTML

Logging in:


This is an interface for Administrator to Log in to the system. The administrator is responsible to for creating other users of the hospital from different departments including doctors, receptionist, pharmacist, laboratorist, bursar.

The following php code was used for log in:

<?php
$con = mysql_connect('localhost', 'root','');
if (empty($con)) {
    echo mysql_error();
 }
 $data = mysql_select_db("Hospital");
 if (empty($data)) {
    echo mysql_error();
 }
?>

The above code performs the following functions, whereby the user enters the username and password and upon clicking the login button it takes the user to the index page provided the credentials are correct.
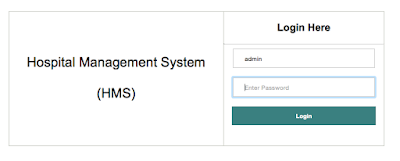
Hospital Login Page
Login Page


ADMINISTRATOR FUNCTIONS

Staff account management:

The administrator is responsible for adding users, adding rooms and updating. The users refered here are Receptionist, Doctors, Pharmacists, lab etc. Below is the Php script to add users to the database whereby I have used the function to describe the parameters to add the users.

Script to Add user to the system.


function adduser()
{
    $username = trim(htmlspecialchars($_POST['username']));
    $fname = trim(htmlspecialchars($_POST['fname']));
    $sname = trim(htmlspecialchars($_POST['sname']));
    $type = trim(htmlspecialchars($_POST['type']));
    $password = trim(htmlspecialchars($_POST['password']));
    $pass = sha1($password);

    $sql1 = "SELECT * FROM `users` WHERE `username`='$username'";
    $query1 = mysql_query($sql1);
    if (mysql_num_rows($query1)==0) {
        $sql = "INSERT INTO `users` VALUES ('$username','$pass','$fname','$sname','$type')";
        $query = mysql_query($sql);
        if (!empty($query)) {
            echo "<br><b style='color:#008080;font-size:14px;font-family:Arial;'>User is Succesifully Added</b>";
        }
    }
    else{
        echo "<br><b style='color:#008080;font-size:14px;font-family:Arial;'>Choose Unique Name</b>";
    }
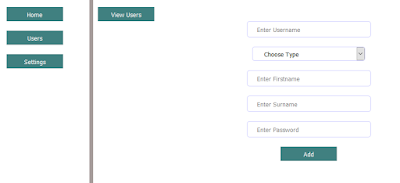
Add Users
Add Users


The total number of users is displayed on the Admin dashboard
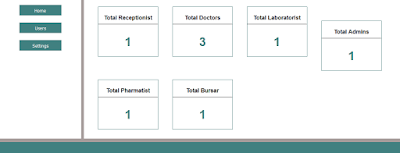
Statistics
Home Page - Statistics


The next step which is most important is because the system comes into function now:


RECEPTIONIST FUNCTIONS


The receptionist logs into the system from the username and password created by the Admin:
Below is the receptionist dashboard and the functions that he / she can perform:
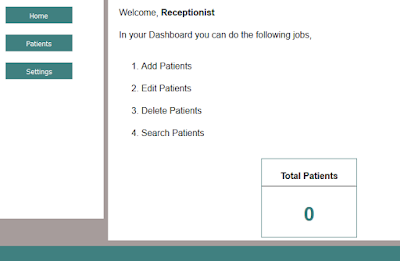
Receptionist Page
Receptionist Homepage

Below is the form the receptionist uses to add patient’s details and underneath the php code:
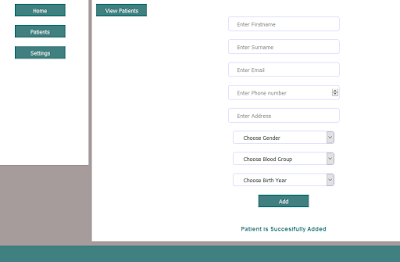
Add Patient
Add Patient Page
 function addpatient()
{
    $fname = trim(htmlspecialchars($_POST['fname']));
    $sname = trim(htmlspecialchars($_POST['sname']));
    $email = trim(htmlspecialchars($_POST['email']));
    $phone = trim(htmlspecialchars($_POST['phone']));
    $address = trim(htmlspecialchars($_POST['address']));
    $gender = trim(htmlspecialchars($_POST['gender']));
    $birthyear = trim(htmlspecialchars($_POST['birthyear']));
    $bloodgroup = trim(htmlspecialchars($_POST['bloodgroup']));

    require_once "connect.php";

    $sql = "INSERT INTO `patient` VALUES ('','$fname','$sname','$email','$address','$phone','$gender','$bloodgroup','$birthyear')";
    $query = mysql_query($sql);
    if (!empty($query)) {
        echo "<br><b style='color:#008080;font-size:14px;font-family:Arial;'>Patient is Succesifully Added</b><br><br>";
    }
    else{
        echo mysql_error();
    }}

The receptionist can update his / her information after logging in for the first time:
Update Receptionist
Update Receptionist


DOCTOR FUNCTIONS


The patient has now been assigned to the doctor and the doctor has received the patient details.


Below is the php script which takes input from the form that the doctor uses to add symptoms from the patient and and then sends the result to the lab for the patient to undergo scans and tests:
function addsymptoms()
{
    $symptoms = trim(htmlspecialchars($_POST['symptoms']));
    $test = trim(htmlspecialchars($_POST['test']));
    if (!empty($symptoms)) {
        $id = $_GET['id'];
        @require_once "connect.php";

        $sql = "UPDATE `medication` SET `status`='laboratory',`symptoms`='$symptoms',`tests`='$test' WHERE `id`='$id'";
        $query = mysql_query($sql);
        if (!empty($query)) {
            echo "<br><b style='color:#008080;font-size:14px;font-family:Arial;'>Succesifully Sent</b>";
        }
    }
}


Featured Post

Download Music Sharing System PHP Source code

Hello welcome again to my blog, today i`m happy to share my first project that I develop by using codeigniter (MVC based php framework)...

Popular Posts